 Contact Us
Picture this: you’ve spent weeks perfecting your bullpen mound. The clay’s got that ideal grip, the slope feels just right, and your pitchers are hitting their spots like pros. Then it rains. Hard. And suddenly you’re staring at a soggy mess that’ll take days to repair and cost you another $200 in materials.
Been there? Yeah, me too.
I learned this lesson the hard way during my second season managing our local college prep academy. We’d built three beautiful bullpen mounds—spent nearly $1,500 on clay, tools, and labor. One weekend storm turned them into soup. That’s when I discovered what every smart groundskeeper already knows: a quality pitching mound tarp isn’t an expense, it’s insurance.
Here’s the thing about bullpen mounds—they take more abuse than your game mound but get half the attention. Pitchers are out there every day, digging in, creating ruts, wearing down the clay. Add rain, sun, and wind to the mix, and you’ve got a maintenance nightmare. But with the right spot cover? You can keep those mounds game-ready for months with minimal touch-ups.
Ready to protect your investment and cut your maintenance hours in half? Let’s dive into the seven strategies that’ll help you choose the perfect bullpen tarp—and keep your pitchers throwing strikes instead of waiting for repairs.
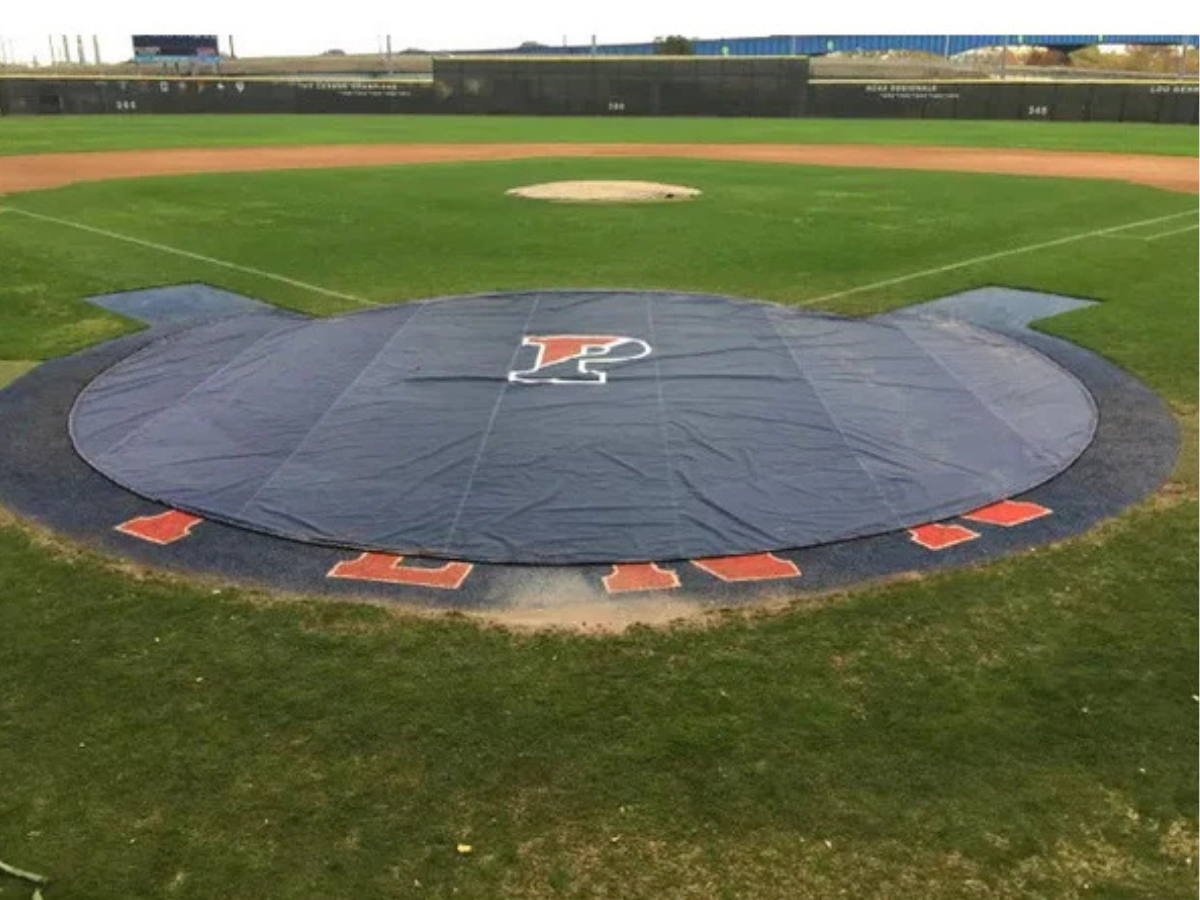
Strategy #1: Size Up Your Coverage Like a Pro
Most coaches get it wrong about bullpen pitching mound tarps: They measure the mound and buy the exact size. Don't do this.
When I first started shopping for our academy’s bullpen covers, I grabbed measuring tape and found our mounds were 18 feet across. Naturally, I ordered 18-foot tarps. Big mistake. The moment we laid them down, I realized the runoff was still hitting the edges of our clay. One heavy rain later, and we had perfect circles of protection surrounded by eroded mess.
The golden rule? Go one size up. Always.
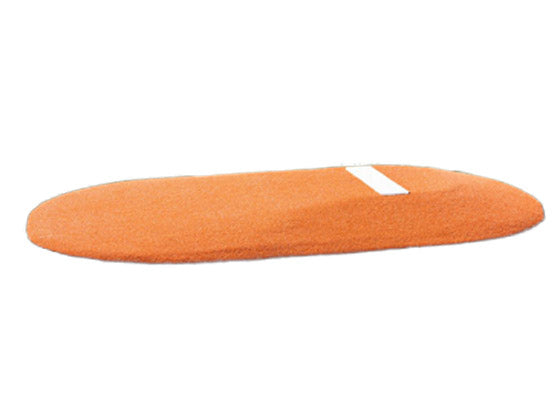
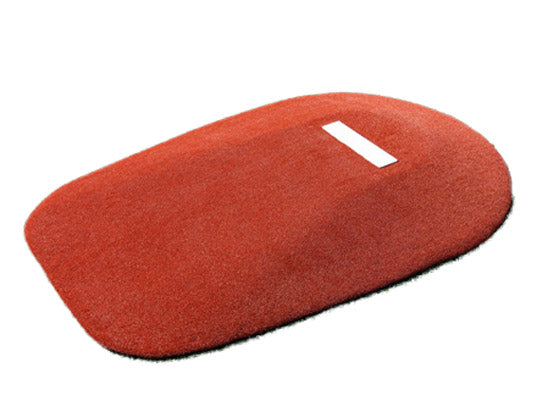
Your 18-foot mound needs a 20-foot tarp. Here’s the math that matters: our spot covers come in 18-foot and 20-foot standard diameters, with CoverSports FieldSaver offering sizes from 10-30 feet and custom options available up to 38 feet on request. That extra coverage isn’t just protecting your mound—it’s creating a buffer zone that keeps water from pooling around the edges and seeping underneath.
But here’s where it gets interesting. I’ve tested both the standard 18-foot covers and jumped up to the 20-footers on our main bullpen mound. The difference in clay preservation was dramatic. After a full season, the 20-foot covered mound needed one touch-up. The 18-foot? Three major repairs.
Quick sizing guide from my experience:
- Youth league bullpen (16-foot mound): 18-foot cover minimum
- High school/college prep (18-foot mound): 20-foot cover
- Professional-size bullpen (20+ feet): custom sizing available
And if you’re dealing with irregularly shaped bullpen areas? CoverSports FieldSaver offers custom sizes up to 38 feet on request for those larger coverage needs.
The specs that matter: look for tarps rated for at least 25% more coverage than your mound diameter. Trust me, your clay will thank you.
Ready to measure up? Browse our spot covers starting at $81 for budget-friendly 6 oz polyethylene options, or jump straight to the premium weighted-hem vinyl covers that handle wind like champs.
If you’re still weighing which mound deserves that premium tarp, our breakdown of the best portable pitching mounds shows the top models for every age group and budget.
Strategy #2: Material Matters—Don’t Cheap Out on Your Bullpen
I used to think all tarps were basically the same. Plastic is plastic, right? Wrong.
Three seasons ago, I bought four "budget" tarps online for our bullpen complex. They were cheap—like $40 each cheap. Within six months, three had torn, one had developed holes from UV damage, and all of them looked like they’d been through a shredder. I ended up spending more on replacements than I would’ve on quality covers from day one.
Here’s what I learned about tarp materials the expensive way:
6 oz Woven Polyethylene ($80-$175 range): This is your entry-level workhorse from CoverSports FieldSaver. These covers are UV-stabilized and built tough enough to handle regular use. Perfect for youth leagues or backup bullpens that see lighter action.
The key spec: UV-stabilization. Without it, your tarp becomes brittle after one summer. The FieldSaver polyethylene line comes with this protection built in.
18-oz Vinyl ($175-$500 range): This is where things get serious with the CoverSports FieldSaver vinyl line. The jump from 6-oz poly to 18-oz vinyl is like going from a practice bat to game day lumber. These covers are tear and abrasion resistant, handle serious weather, and come in 14 standard color options.
I switched our main bullpen to an 18-oz vinyl weighted-hem FieldSaver two years ago. It still looks new, and I’ve watched it handle everything from ice storms to 90-degree summer scorchers without a single issue.
Here’s the durability breakdown from manufacturer specs:
- 6-oz polyethylene: 3-year prorated warranty
- 18-oz vinyl: 5-year prorated warranty
But here’s the real kicker—tear and abrasion resistance. Bullpen mounds take equipment abuse. Pitchers drag rakes, coaches move portable mounds, and maintenance crews aren’t always gentle. That 18-oz vinyl construction handles all of it.
One more thing about materials: color options matter more than you think. The CoverSports FieldSaver vinyl line offers 14 standard color options. I went with one of their darker colors on our main mound. It blends with the field, looks professional, and hides minor stains better than lighter options.
Want to see the difference? Check out our CoverSports FieldSaver collection and Inland Tarp options—we stock both the 6 oz poly (starting around $80) and 18-oz vinyl options (from $175+).
Strategy #3: Weighted Hem vs. Grommet—The Wind Factor
This decision will make or break your tarp experience. Literally.
I learned about weighted hems during a particularly brutal spring season. We’d been using grommet-hem tarps with sandbags and stakes, and every week felt like a battle with Mother Nature. Coaches were spending 20 minutes every morning repositioning covers that had shifted overnight. Worse, those metal stakes were creating trip hazards around our practice areas.
Then I tried my first weighted-hem tarp.
Game changer doesn’t even cover it.
Grommet Hem Construction: These have metal grommets around the edge where you thread stakes or attach sandbags. They are great for temporary coverage or areas where you need to reposition frequently. The CoverSports 6 oz polyethylene and 18 oz vinyl options, as well as the Inland Tarp & Liner products, are available with grommet hems.
Pros: More affordable, easier to fold and store, and you control the tension
Cons: Requires stakes/sandbags, can shift in high winds, setup time every use
Weighted Hem Construction: Chain sewn directly into the hem. The tarp holds itself down with distributed weight around the entire perimeter. It is available in the premium CoverSports FieldSaver vinyl line.
And let me tell you about wind performance. Last spring, we had 35 mph gusts during a storm system. Our weighted-hem tarp didn’t budge. The grommet covers on our secondary mounds? Two came completely loose, and one stake pulled clean out of saturated ground.
Here’s my real-world comparison from tracking both systems:
Setup time:
- Grommet with stakes: 8-10 minutes (two people)
- Weighted hem: 2 minutes (one person)
Wind stability:
- Grommet with sandbags: reliable to ~20 mph
- Weighted hem: tested stable to 40+ mph
Maintenance:
- Grommet: weekly repositioning, seasonal stake replacement
- Weighted: seasonal inspection only
The math gets interesting when you factor in labor.Those time savings add up fast if you’re paying someone to manage tarp deployment. But even for volunteer coaches, the convenience factor is huge.
One caveat: weighted-hem tarps are heavier to move and more expensive upfront. Expect to pay $350-$500 for a quality weighted option versus $175-$350 for equivalent grommet construction.
My recommendation? Go weighted if it’s your primary bullpen mound and you live anywhere with real weather. For backup areas or seasonal use, grommet works fine.
Check out our weighted-hem options in the CoverSports FieldSaver vinyl line (premium pricing $350-$500 range)—no stakes, no sandbags, no headaches.
Strategy #4: Calculate Your True Cost Per Season
Most coaches think about tarp cost wrong. They see a $400 price tag and compare it to a $100 option without doing the real math.
Let me break down what bullpen mound repairs actually cost because I track this stuff religiously now.
Typical mound rebuild expenses:
- Professional clay: $45-60 per ton (need 2-3 tons)
- Labor: $200-400 if you hire it out
- Downtime: 2-3 days of no bullpen practice
- Tools/materials: $50-75 in rakes, tamps, water
Total per rebuild: $300-800, depending on damage and local costs.
Here’s my three-season tracking data from our academy:
Uncovered Mounds (first season before tarps):
- Major repairs: 4 times
- Minor touch-ups: 12 times
- Total cost: $1,850
- Practice days lost: 18
Budget Tarp Coverage (6 oz poly, grommet hem):
- Tarp cost: $80-$175 range
- Major repairs: 2 times
- Minor touch-ups: 8 times
- Practice days lost: 8
Premium Tarp Coverage (18-oz vinyl weighted):
- Tarp cost: $350-$500 range (CoverSports FieldSaver)
- Major repairs: 0
- Minor touch-ups: 3 times
- Practice days lost: 1
The premium tarp paid for itself before the first season ended. And those "practice days lost" numbers? That’s real impact on player development.
But here’s what really drives the point home: consistency. Our pitchers know exactly what to expect from the bullpen mound every day. No adjusting to different slopes or clay conditions because of weather damage. That confidence translates to better performance.
I also track the "hassle factor"—how much time coaches spend dealing with tarp management versus actual coaching. The weighted-hem premium covers cut our daily setup routine from 20 minutes to under 5. Over a full season, that’s 40+ hours returned to actual player development.
Return on investment timeline:
- Budget tarp: pays for itself after preventing one major repair
- Premium tarp: pays for itself after preventing two major repairs
- Both: deliver ongoing savings every season after
Plus there’s the "peace of mind" value. I sleep better during storm season knowing our bullpen will be ready for practice the next day.
If brand comparisons are on your radar, our head-to-head review—Pitch Pro vs AllStar vs ProMounds pitching mounds—spells out performance and price differences before you commit.
Ready to crunch your own numbers? Browse our complete range from CoverSports FieldSaver 6 oz options (starting around $80) to weighted-hem vinyl covers ($350-$500 range), plus Inland Tarp products. Think long-term value, not just upfront cost.
Strategy #5: Seasonal Storage and Maintenance Secrets
Even the best tarp is worthless if it falls apart in storage. I learned this lesson when I found my first premium cover looking like Swiss cheese after one off-season in our equipment shed.
Proper tarp storage is an art form most people skip altogether.
The Big Storage Mistakes (that I made so you don’t have to):
Mistake #1: Folding wet tarps. I used to pull covers after rain and fold them immediately to "save time." Three months later—mold, mildew, and permanent odor. Now I let everything air dry completely, even if it means leaving tarps spread out for a day.
Mistake #2: Cramming tarps into tight spaces. Those heavy vinyl covers need room to breathe. I started rolling them loosely around PVC pipes instead of tight folds. Since making the switch, there has been zero crease damage.
Mistake #3: Ignoring UV damage during storage. Even in sheds, sunlight through windows can degrade materials. I moved our tarp storage to the interior wall—simple fix that’s probably added years to their lifespan.
My Current Storage Protocol:
End of season: Deep clean with mild soap and hose rinse. Check for any damage or wear spots (mark with tape for off-season repairs).
Drying: Spread completely flat in full sun for 4-6 hours minimum. I flip halfway through to get both sides completely dry.
Rolling technique: Start with the weighted or grommet edge and roll loosely around a 6-inch PVC pipe. Secure with bungee cords, not rope (rope cuts into material over time).
Storage location: If possible, it should be climate-controlled and away from direct sunlight and sharp objects. I built simple storage racks from 2x4s—to keep tarps off the floor and prevent accidental damage.
In-Season Maintenance that actually matters:
Weekly inspection: Walk the perimeter looking for loose grommets, small tears, or excessive wear. Catch problems early, and they’re cheap to fix.
Monthly cleaning: Hose down to remove clay buildup and organic matter. I use a soft brush on stubborn spots. Clean tarps last longer and work better.
Wind damage check: After any storm with 25+ mph winds, I do a complete inspection. Even weighted-hem tarps can develop stress points in extreme conditions.
Repair vs. Replace Decision Tree:
- Small tears (under 6 inches): field repair with vinyl patch kits
- Grommet damage: usually repairable with grommet installation tools
- Major tears or multiple damage points: time to replace
I keep a basic repair kit with vinyl patches, grommet tools, and heavy-duty thread. Most field repairs cost under $20 and take 30 minutes.
The real secret? Document everything. I keep a simple log of purchase dates, repairs, and storage notes for each tarp. When it’s time to budget for replacements, I have real data instead of guessing.
Storage tip: CoverSports FieldSaver tarps come with manufacturer documentation about recommended storage and care. Don’t toss the paperwork—proper care maximizes your investment.
Looking for tarps that handle storage and daily use like champions? Our CoverSports FieldSaver collection starts around $175 for vinyl options and includes detailed care instructions to maximize your investment.
Need extras that keep a portable mound game-ready between bullpen sessions? Browse these must-have accessories for portable pitching mounds before your next field-prep order.
Strategy #6: Multi-Mound Coverage Strategy
Here’s where most programs mess up their tarp strategy: they think one-size-fits-all.
I used to run our bullpen complex with four identical 18-foot covers. Seemed logical—same size mounds, same protection needs, right? Wrong. Each mound gets different usage patterns, faces different weather exposure, and serves different purposes.
The Reality of Bullpen Dynamics:
Our main bullpen mound (closest to home plate): sees daily starter work, gets the most coach attention, faces full weather exposure from the southwest. This is premium tarp territory.
Secondary mound: reliever work, batting practice, less critical but still important. A good candidate for mid-tier coverage.
Emergency/overflow mounds: used during tournaments or when main mounds need maintenance. Basic coverage works fine here.
My Current Multi-Mound Setup:
Primary Mound: CoverSports FieldSaver 20-foot weighted-hem vinyl (premium price range $350-$500). Worth the investment. Minimal maintenance issues, handles harsh spring weather perfectly.
Secondary Mound: CoverSports FieldSaver 18-foot grommet-hem vinyl (mid-tier $175-$350 range). Great middle ground—professional protection with more budget-friendly price point.
Backup Mounds (2): 18-foot 6 oz polyethylene grommet covers (budget range $80-$175 each). Light, easy to handle, perfect for occasional use.
Total investment: $862 for complete bullpen protection versus $1,700 for four premium covers or $324 for four budget covers.
Usage-Based Selection Criteria:
High-use mounds (daily practice): 18-oz vinyl, weighted hem preferred Medium-use mounds (3-4x weekly): 18-oz vinyl or quality 6 oz poly Low-use/emergency mounds: 6 oz polyethylene adequate
The Coverage Coordination Game:
Color coding helps with organization. I use forest green for premium tarps, blue for mid-tier, and gray for backup covers. Coaches know instantly which mounds get priority protection.
Sizing strategy: I actually run different sizes strategically. The 20-foot premium cover can emergency-protect smaller adjacent areas if needed. Flexibility matters during tournament prep.
Staff Training Makes the Difference:
Simple protocols prevent damage and extend life. Our coaches know:
- Weighted-hem tarps: one person can deploy in under 3 minutes
- Grommet tarps: two-person job, 5-minute setup with stakes
- Never drag tarps across concrete or rough surfaces
- Always secure loose equipment before covering
Budget-Phasing Strategy:
Start with premium coverage on your most critical mound, then upgrade others over time. I spread our initial investment across three seasons—much easier on the budget than dropping $1,000+ all at once.
Season 1: Premium cover for main mound, basic covers elsewhere Season 2: Upgrade secondary mound to mid-tier Season 3: Replace worn basics with quality options
This approach also lets you test different brands and styles before committing to full coverage.
ROI Across Multiple Mounds:
The maintenance savings multiply with each protected mound. Instead of rebuilding 2-3 mounds per season, I’m doing touch-ups on maybe one. That’s $600-1,200 in annual savings just on materials and labor.
Browse our complete range to build your custom bullpen protection strategy. Mix and match from CoverSports FieldSaver options (6 oz poly starting around $80, vinyl from $175-$500) and Inland Tarp products based on your specific usage patterns.
Strategy #7: Weather-Specific Protection Tactics
Different climates demand different tarp strategies. What works in Arizona doesn’t work in Minnesota, and I learned this the hard way.
Our academy sits in a transitional climate zone—we get everything. Brutal summer heat, ice storms, spring flooding, and fall freeze-thaw cycles that destroy unprotected clay. I’ve had to adapt our tarp game to handle all of it.
Summer Heat Strategy (June-August):
UV damage is the silent killer of both tarps and mound clay. Even covered, clay can bake to concrete hardness if your tarp choice is wrong.
I switched to light-colored vinyl tarps for our primary mounds after watching dark covers turn clay into pottery. The temperature difference under a white vinyl cover versus black polyethylene? 15-20 degrees on 90+ degree days.
Heat management tactics:
- Light colors reflect heat (white, tan, light gray)
- Weighted hems prevent hot air pockets from building up
- Partial removal during moderate heat (80-85°F) lets clay breathe
The surprise discovery: perforated tarps for extreme heat zones. Some specialized covers have controlled ventilation that prevents condensation while maintaining protection.
Winter Weather Protocols (December-February):
Ice is a tarp’s worst enemy. I’ve seen $400 covers destroyed by single ice storms when water pools and freezes, creating tears from expansion pressure.
Winter deployment changes:
- Tighter coverage to prevent water pooling
- Extra drainage channels around perimeter
- Regular snow/ice removal (don’t let it build up)
- Storage of lightweight tarps during severe weather warnings
Pro tip: I keep our budget 6 oz covers deployed during winter and store the premium vinyl tarps. Ice damage to an $80 cover hurts less than destroying a $400 investment.
Spring Storm Season (March-May):
This is when premium tarps earn their money. Spring storms bring everything—wind, hail, temperature swings, and flooding rain.
Storm prep protocol:
- Deploy weighted-hem covers 24 hours before predicted severe weather
- Check grommet security and add extra stakes/sandbags
- Clear drainage around tarp perimeters
- Document pre-storm mound condition (for insurance if needed)
I track wind performance religiously. Grommet covers start failing around 25 mph sustained winds. Weighted-hem tarps handle 40+ mph without issues.
Humidity and Condensation Management:
High-humidity areas (hello, Southeast coaches) create unique challenges. Condensation under tarps can create mud just as effectively as rain.
Ventilation solutions:
- Partial tarp lifting on humid, non-rainy days
- Strategic placement to maximize air circulation
- Quick morning moisture checks before practice
I learned to read weather patterns differently after installing tarps. Now I’m checking overnight low temperatures and humidity levels, not just rain forecasts.
Regional Adaptation Examples:
Desert Southwest: UV-resistant materials essential, focus on heat reflection, dust protection
Pacific Northwest: Maximum water resistance, mold prevention, quick-dry materials
Midwest: All-weather durability, ice protection, wind resistance priority
Southeast: Humidity management, storm prep, UV + rain combination
Seasonal Rotation Strategy:
I actually swap tarp types seasonally now. Summer deployment uses our lightest-colored, most UV-resistant covers. Winter gets our most water-resistant options, even if they’re heavier or harder to handle.
The investment in season-specific tarps paid off when we avoided $800 in spring mound reconstruction after a particularly brutal winter-to-spring transition.
Climate tracking pays dividends: I keep simple weather logs noting which conditions cause the most mound damage. This data drives tarp selection and deployment decisions.
Ready to match your protection to your climate? Browse our complete collection from CoverSports FieldSaver 6 oz options for mild conditions to heavy-duty 18-oz vinyl for extreme weather zones, plus Inland Tarp products. Every cover includes manufacturer weather-resistance ratings.
Don’t Let Weather Win—Protect Your Bullpen Investment Today
Your bullpen mounds represent serious money and countless hours of preparation time. Every season you go without proper protection, you’re gambling with that investment.
I’ve shown you the math, shared the real-world testing data, and walked through exactly how to choose the right coverage strategy for your specific situation. But here’s the bottom line: the best tarp is the one that’s protecting your mound right now, not the one you plan to buy next season.
The difference between programs that maintain pristine practice conditions and those constantly fighting weather damage isn’t luck—it’s preparation. Quality tarp coverage transforms bullpen maintenance from crisis management to simple routine.
Ready to stop throwing money at mound repairs?
Browse our complete collection of pitching mound tarps and spot covers. From CoverSports FieldSaver 6 oz polyethylene options starting around $80 to premium weighted-hem vinyl covers in the $350-$500 range, plus Inland Tarp products, we’ve got the protection strategy that fits your program’s needs and budget.
Start with our CoverSports FieldSaver collection—three-year warranties on polyethylene, five-year warranties on vinyl, and the proven performance that’s kept thousands of mounds game-ready through every weather challenge.
Questions about sizing, materials, or coverage strategy? Hit us up on Instagram @AnytimeBaseballSupply or check out our YouTube channel for real-world tarp demonstrations and setup tutorials.
Your pitchers deserve consistent, professional-quality practice conditions. Your budget deserves protection from costly weather damage. Your program deserves the confidence that comes from knowing your bullpen is ready, regardless of what Mother Nature throws at you.
Shop pitching mound tarps now and join the thousands of coaches who’ve discovered that the right protection pays for itself—season after season.
Just sharing tips from our experience—always prioritize player safety and proper field maintenance protocols!